Just a collection of everything that comes into my little corner - the kitchen...each I consider a treasure that I would like to share with you.
2007-12-31
Apple Crumble Pie
Ahhh the apple pie that was suppose to be part of the feast... Maybe next year....
Normally we would have this delightful dessert since apples are abundant this time of year. My cousins would eat this with vanilla ice cream... Apple ala Mode! Yummm. Traditionally, we would make the 2 crusted apple pie. But with the time constraint and the lack of helping hands, I have been making Apple Crumble for three years now. When I discovered this, it was heaven sent for me. I usually hate rolling the dough and fitting it on to the pie plate. I used to have a difficult time making an even leveled dough. One side would always be lopsided or thinner. But having baked a lot of pies (I can't count them anymore), I have somehow mastered by now. :)
Tips in making pie crusts:
1) Use cold lard or butter instead of soften or melted.
2) Flaky crusts are made when bits of lard or butter is layered between flour then melts when baked.
3) Add 2 tablespoons of cold water at a time and gradually increase until the dough binds well. If added too much liquid, add a little more flour. Too little water would produce a crumbly dry dough.
4) Don't overwork the dough else it may become tough.
5) Use wax paper or plastic wrap when rolling out dough for less mess on the counter.
6) Start from the center when rolling out the chilled dough towards the end for a more even distribution.
7) Chill the pie crust prior to baking. This will help retaining the shape of the fluted pie border.
8) Peirce the bottom with a few holes using a fork.
9) Brush the bottom with egg white or bake for a few minutes to prevent a soggy bottom.
10) Cut vents to avoid the lower crust from being soggy and it will allow the steam to excape.
2007-12-30
Oriental Steamed Fish
We went to the market to buy seafood a day before the big day. We bought prawns, crabs and lapu-lapu (grouper). I would have enjoyed taking photographs because of the wide variety of fresh foods but I would need both of my hands to carry everything else. So I decided not to bring my camera or cellphone. Maybe in the future, I will get my chance to showcase the abundant treasures the wet market has to offer.
As part of the Christmas feast, we added this dish. Everyone loves how I make it and I decided to share the recipe with you. It is simple and easy to do. The important tip can share with you is that the fish should be at its most freshest state. If you could get live ones, the dish would taste alot better. The meat would be tender and succulent. This is making me hungry for another bite... :)
The Ingredients:
800 grams - 1 kilo whole fish, cleaned, slit both sides with 2 diagonal slits, patted dry
1/4 teaspoon rock salt
1/4 teaspoon sugar
1/2 inch ginger, peeled and sliced into disks
1/2 - 3/4 inch ginger, peeled and sliced into very thin strips
5-8 stalks of green onions, sliced to 2 inch strips
1 small red onion, peeled and sliced thinly
1/4 cup corn or canola oil
2 tablespoon sesame oil
2-3 tablespoon soy sauce
Cooking Procedure:
Place water in a steamer and bring to a boil. Insert ginger disks into the cavity and slits of the fish; let the ginger marinate into the fish to remove the "fishy" smell and taste. Lay the fish on top of the oiled steamer rack. The oiled layer helps the fish from sticking.
If there is no steamer available, take a large wide pan with a lid, add water and place a heat resistant bowl on the center with a heat resistant oiled platter on top. Make sure that when you place the fish, it will fit onto the platter and the pan can be covered well so that the steam would not escape. If the fish happens to be to large, you may slice it into too.
Once the water starts to boil, place the steam rack on top and allow the fish to cook for 25-30 minutes. To know if the fish is done, the juices should run clear and when pierced, the meat is flaky. Try not to overcook else the meat becomes dry.
Once the fish is done, transfer onto the serving dish. Remove the excess liquid from the serving dish; discard the ginger disks then sprinkle with salt and sugar. Heat the corn or canola oil. Arrange the remaining sliced ginger, onions and green onions on the fish. Pour over the soy sauce over the fish. When you see wisps of smoke, add the sesame oil then pour over the fish. This gives a shiny finished look and emits an aromatic scent as the oil cooks the ginger and onions. Just be careful that you do not splatter the oil onto your skin. Serve hot.
Buttered Garlic Shrimps
Everytime there is a special occasion at home, mom would prepare this simple, easy and yummy crustaceans (next to crabs of course). Each member of the family to grab their own share trying to look for the biggest and juiciest. Mom would pile them really high, placing the medium and small sized on top. When everyone have taken their first share of shrimps, Mom would then dig into the bottom center and grab the most biggest and juiciest prawn ever. A sure clever trick.
After peeling away each shrimp, we would dip it back to the butter garlic sauce that was cooked in. Dad prefers to dip his in vinegar will lots of crushed garlic and a pinch of salt. Anyway eaten, they taste really great and one would always go back for more.
The Ingredients:
1-2 lbs. (1 kilo) of fresh shrimps, whiskers trimmed
1 tbsp. rock salt
1 12oz Sprite or 7-up
1 1/2 heads of garlic, peeled and crushed
1/3 cup butter
Cooking Procedure:
Place the shrimp in a frying pan or wok and season with salt. Pour in the soda. Cover the pan and heat for 8 minutes or until the shrimps are bright in color. Do not over cook because the shrimps will become tough. Set aside.
Melt butter. Saute in the garlic until they become tender and light brown in color but not burnt. Toss in the cooked shrimp in the butter garlic mixture. Add a few tablespoons of the liquid used in boiling the shrimp. Simmer for a minute or two then transfer into a serving plate.
Holiday Feast
Finally, time to update and get back on track. I have been busy with my Christmas Project, baking and cooking for the Christmas presents for family and friends. I am pleased with the out come with the search for this year's baked treat. I will share with you the winning recipe soon. I never got the chance to shop for the gifts for my godkids, so I ended up giving them Christmas money instead. I am sure their parents would know what to do with it. (Most of my godchildren are in the toddler stage to pre-school).
This year, we are celebrating Christmas and mom's birthday with simple dishes. Yes, you read it right. Mom's birthday falls on Christmas day. She says that it is a great honor to have the same birthday celebrations with Christ but it deprives her of having two gifts in a year. Aw, mom... I try to make sure that she gets 2 presents from me. I love receiving gifts but I love giving more. It is a delight to see the wonder smiles and eyes lit-up.
So back to the feast... Here is the menu:
Macaroni Salad
Mom's Pancit (Egg Noodles)
Buttered Garlic Shrimps
Pork Spring Rolls
Oriental Steamed Fish
Honey Garlic Roasted Chicken
Roasted Suckling Young Pig (Lechon de Leche)
Steamed Rice
Assorted Softdrinks
Fruit Salad
Leche Flan
Mango Dulce de Leche and Rocky Road Ice cream
Green Tea and brewed coffee
We had home-made Apple Pie to the list but decided to present this to a relative. I accidentally miscalculated the number of recipients and the pies I made. I was one short. :)
I will be posting some of the recipes and hopefully you would try them. May you enjoy your holiday celebration filled with love and laughter as much as we enjoyed ours.
Happy Holidays!!!
2007-12-20
Spiced Spiked Pumpkin Muffins
As I was busy with my search for the ultimate Christmas goodies for this year, I thought of using locally grown products and something that would make the treats not only delicious but healthy at the same time. When we received 2 heads of winter squash from the province, I decided to look for something made out of pumpkins. I came across Farmgirl Fare's Spicy Pumpkin Pecan Raisin Muffins. The photo beaconed me to give the recipe a chance. So after studying and thinking of tweaking the ingredients, I was able to create a spiced and spiked pumpkin muffin. I replaced the orange juice with triple sec, and increased the amount of the wheat flour to 1 cup and subtracted half a cup from the flour. I ran out of honey so I replaced it with maple syrup.
The Ingredients:
1 cup raisins
3/4 cup Triple Sec (or rhum)
2 1/2 cups all-purpose flour
1 cup whole wheat flour
2 teaspoons baking soda
1 teaspoon of each: baking powder, salt, cinnamon, nutmeg
1/2 teaspoon ground cloves
1/2 cup margarine or butter
1 cup brown sugar, packed
1/2 cup maple syrup
3 eggs
1 pound fresh pumpkin puree (about 450 grams, peeled, boiled and pureed)
1 cup chopped nuts (i used walnuts)
Cooking Procedure:
In a saucepan, boil the raisins with the triple sec until plump. Set it aside.
Combine the dry ingredients together. Combine margarine, sugar, maple syrup, and eggs in a large bowl and mix well. Stir in pumpkin puree. Fold in the dry and wet ingredients into the pumpkin mixture alternately. Stir in the nuts.
Pour 2/3 cup-full into greased muffin or cupcake tins. Bake until a toothpick inserted in the center comes out clean, about 25 to 30 minutes in a 350F pre-heated oven. Cool muffins in tins for 15 minutes on wire racks. Store in an air tight container.
My Notes:
My first attempt in making this was a flop. I over mixed it and failed to notice that I used dark brown sugar instead of brown sugar. The cake became too sweet and crumbly. But we enjoyed the spicy spiked taste with a hint of maple. I didn't want to put this to waste, so I whipped up some heavy cream, and added alittle vanilla. Layered it then topped with chocolate curls. Chilled it for 4 hours. I had an instant Refrigerator Pumpkin Spiked Cake. (Sorry I forgot to take a photo.)
In my second attempt, I had the sugar and procedure right. I had a couple of pumpkin puree left over, so I topped some of the muffins with a tablespoon before placing it in the oven. It had a creamy top and gave a more pumpkin flavor.
For a ginger-y taste, add 1 teaspoon of ginger.
Keeping them in a tight container for a few days in the refrigerator, the muffins had a similar taste to fruitcakes without the extra dried and glaced fruit.
The verdict:
Not bad at all... Not bad at all... A definite potential...
To Farmgirl Susan:
Thank you for this wonderful recipe. I definitely enjoyed making them. I am looking forward to repeating the experience soon. :)
2007-12-17
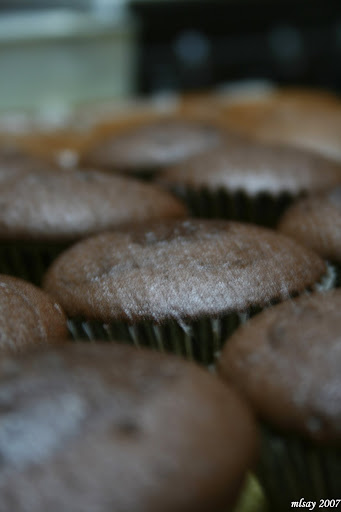
Rich Chocolate Cupcakes
In continuation with the previous entry about my Christmas Project and chocolate cupcakes, this is the second installment. This version is moist and almost feels like it melts-in-your-mouth. It is definitely really as good as the other recipe. The preparation and preparation is similar except the eggs were separated. The whites were beaten stiff while the other one didn't require this step.
I hope you enjoy this version as the much as I did.
The Ingredients:
1/2 cup + 2 tablespoons butter
1 cup sugar
2 eggs, separated
3/4 cup milk
2 cups all-purpose flour
2 teaspoons baking powder
1/4 teaspoon salt
1/4 teaspoon baking soda
1 tablespoon vanilla extract
8 tablespoons cocoa powder
Cooking Procedure:
Combine all the dry ingredients and sift together. Beat the egg whites until they are stiff, set aside. Cream the butter and sugar. In a separate bowl, beat the yolks until creamy. Add yolks with the butter mixture, mix thoroughly. Add alternately the milk and flour, adding alittle at a time until thoroughly mixed. Fold in stiffly beaten egg whites into the mixture. Fill in muffin tins about 2/3 cup full and bake in a pre-heated oven at 375F for 25 minutes or until the muffins are done.
My Notes:
Use room-tempered eggs when beating egg whites. Try to use whipped egg whites immediately after it has reached the desired stage to avoid deflating.
If it was over whipped, add another egg white and beat until the desired stage is reached. (But note that the measurements are not accurate anymore since the proportions in the recipe has changed with the extra egg white.)
Pink and Green Choco Cupcakes
In line with my Christmas Project, I thought of doing cupcakes as one of the possible candidates. Loving chocolate, I thought why not chocolate cupcakes with butter cream icing. I had to back out from the idea because it would require that the cupcakes be delivered ASAP so that the butter cream would not melt. With the weather we have, the possibility of transporting boxes of cupcakes to all the houses of my recipients might turn out into a disaster. I also do not have enough room to store all the made cupcakes in the refrigerator. (How I wish I had those industrial refrigerators that would be large enough to store everything I need and create). Besides, I prefer to give my goodies on the same day they were made. That way I make sure they are at their most freshest state. (This rule does not apply for fruitcakes thought :D)
I tried two versions of chocolate cupcake that my aunt shared with me. Both are chocolaty good but the other one is denser than the other. I used the excess frosting I made for the carrot cake and added food coloring to differentiate one from the other. Now I can't remember whether the green one was denser than the pink. Oh well, I am still going to share this with you in case you just want to try it out and judge for yourself which one is best.
I am going to separate the second Chocolate Cupcake recipe so that you wouldn't be scrolling down and it would be easier for you to bookmark the version you like best.
The Ingredients:
2 eggs
1 cup sugar
1 cup all-purpose flour
6 tablespoons unsweetened cocoa powder
2 teaspoons baking powder
1 teaspoon vanilla essence
2/3 cup milk
2/3 cup butter, melted
Cooking Procedure:
Grease the muffin tins or cups with oil or line them with paper muffin cups. Preheat the oven at 350 deg F or 180 deg C. Mix all the dry ingredients together. Beat the eggs and sugar together. Add 1/3 of the dry ingredients and and 1/2 of the milk. Mix together and alternately add the dry and wet ending with the last 1/3 of the dry ingredients. Add vanilla. Fold in the butter. Pour into muffin tins filling only 2/3s full. Bake for about 30 minutes or until an inserted wooden toothpick or knife comes out clean.
Serves 12 regular sized cupcakes.
My Notes:
I frosted with the remaining cream cheese frosting I used to frost the carrot cake. I could have frosted it with chocolate ganache or icing but wouldn't want the cream cheese frosting go to waste. I dropped a few food coloring into the frosting to get the desired color. I just can't remember if I used the green or red frosting to top these. :D
The verdict:
The chocolate cupcakes were good according to everyone who tried it. One found the frosting too sweet with the cupcake. My gut feel tells me that the search is still on.
2007-12-06
Orange Speckles
Mom was requesting for carrot cake and decided to make her one. I halved the recipe batter and the frosting into two. The first half was placed into a loaf pan and the rest into muffin tins. I baked the cupcakes for about 15-20 minutes. I was considering of adding this as part of my Christmas Project but decided not to. There are plenty of carrot cakes out there already. I know it is simple to do and the ingredients are not hard to find. But I want a special one that is different.
One thing I got out of this adventure, I was able to play around with food coloring and modified the look of the cream cheese frosting. I didn't want to store it in the freezer for future use. I added the remaining grated carrot (about 1/3 cup) to 1/3 of the frosting. And viola, an orange speckled frosting over moist carrot cupcakes. The taste of carrots in the frosting wasn't that evident but the color and texture was pleasing IMHO.
Loaf of Carroty Goodness
Mom asked me to make carrot cake. I took the challenge and wanted to make something different out of it. Of course, she wouldn't have any of that. So to compromise I halved the recipe batter and the frosting. I made her a carrot cake without the layers and baked it in a loaf pan. The other half of the recipe went to my Christmas Project.
Normally we would not add the cream cheese frosting for our carrot cakes. But I wanted to play with food coloring that time so I went ahead. I enjoyed making pink and green colored frosting. As a result, I had 3 colors of frosting: white which ended up on the carrot loaf; pink for chocolate cupcake 1 and green for chocolate cup cake 2. I still had a lot left over and decided to do this. Just click on the link to find out ;).
For amateur "food colorists", do be careful that you do not get some on your palms. I ended up having red and green spots. But need not be alarmed, they wear off in time.
Carrot Cake
from Mom's Recipe files
The Ingredients:
The Cake:
3 eggs, beaten
1 1/2 cups sugar
1/4 cup vegetable oil
1 teaspoon vanilla
1 teaspoon baking soda
1 teaspoon salt
1 teaspoon cinnamon
2 cups flour
3/4 cup buttermilk*
3 cups grated carrots (about 1 - 1/2 kilo carrots, peeled and grated)
1/2 c. chopped nuts
Cake Cooking Procedure:
Preheat your oven at 350 degrees. Grease and dredge 2 9x9 round cake pans or 2 loaf pans. Combine all the dry ingredients in a bowl. Beat the eggs, sugar, oil and vanilla together. Add 1/3 of the flour mixture then 1/2 of the buttermilk; add the flour and buttermilk alternately until the mixture is slightly lumpy. Add carrots and nuts; blend well. Bake for 35-45 minutes or until the cake is done**.
Prepare the frosting recipe below.
If you used 2 9x9 round pans, Frost the top of the bottom layer by spreading almost 1/3 of the frosting. Place the second cake on top. Frost the top and sides with the remaining frosting.
If you used loaf pans, divide the frosting into to and frost each of the loaves.
The Cream Cheese Frosting:
3 ounces cream cheese, softened
1/4 cup butter or margarine
2 cups powdered sugar
2 teaspoons vanilla
1/4 cup chopped nuts
Frosting Procedure:
Cream butter and cream cheese. Add the vanilla and powdered sugar. Fold in the nuts.
My Notes:
* Buttermilk Substitute
If buttermilk is not available, add 1 tablespoon of vinegar or lemon juice for every 1 cup minus 1 tablespoon of milk. Let it stand for a at least 10 to 15 minutes.
** Cake-is-Done Test
You may use the knife or toothpick test to check if the cake is done. Insert the knife at the center of the cake; when you pull it out and it comes out clean, the cake is done. If not, continue to let it cook and retest.
2007-12-03
Candidate 2: Crunchy Nanas
While browsing the net I came across BakingBites and saw the Crunchy Banana Muffins. I thought of adding this entry as one of the candidates for the Search for Christmas treats 2007. The recipe was simple, the ingredients were readily available and it was a different approach to the traditional banana bread we would give to loved ones. My aunt who is a prime lover of banana bread would definitely love this.
The verdict: It was good for taste and appearance. It was definitely moist. My blunder was the crumble. It should have a crunchy top. I have over mixed it and the butter became too soft. I should have made the crumble last or at least placed it in the fridge to keep it's shape. It still was fun to make and the folks who have tried it said it was good even without the crunch.
And the search continues...
Note: I hope Nicole of BakingBites wouldn't mind me linking back to her site. I would love to post her recipe her but I still haven't heard from her yet. You may visit the link here to get the recipe and try it out.
Update: Yipee. I can share with you the recipe. Thank you Nicole! :D
Banana Crumb Muffins
from BakingBites.com
Muffin batter:
1 ½ cups all purpose flour
½ tsp baking soda
½ tsp baking powder
½ tsp salt
2/3 cup sugar
3 tbsp vegetable oil
½ cup buttermilk
1 egg
2/3 cup (2 medium) mashed bananas, divided
1 tsp vanilla
Crumb topping:
½ cup flour
1/3 cup sugar
¼ tsp salt
3 tbsp shortening, cut into small pieces.
1 tbsp mashed banana (reserved from 2/3 cup mashed banana)
Preheat oven to 350F. Grease or line 12 muffin tins with paper liners.
Prepare the crumb topping: In a small bowl, whisk together flour, sugar and salt. Cut shortening into flour mixture until it resembles coarse crumbs. Larger crumbs are a bit more desirable. Stir in the mashed banana and set bowl aside.
Prepare the batter: In a medium bowl, sift together flour, baking soda, baking powder and salt. In a large bowl, whisk together sugar, vegetable oil, buttermilk, egg, bananas and vanilla. Pour flour mixture into banana mixture and stir until batter is just combined. Spoon into muffin tins, filling each 2/3 full. Top each muffin with crumb mixture, dividing it evenly.
Bake for 18-21 minutes, until a tester comes out clean and the muffins spring back when gently touched.
Makes 12 muffins
2007-12-02
Stuck to the Pot
I have been procrastinating in making dumplings for a few weeks now until I took the opportunity to really try my skills in making this simple dish.
Dumplings are distantly related to wantons because both may contain meat and vegetable fillings. However, the dumpling wrapper is thicker and oblate in shape and sealed by crimping the edges together making a closed crescent or purse. These are usually accompanied by a soy sauce-based sauce with and or chili paste. In cooking dumplings, they can be just steamed, boiled, pan or deep fried. Or a combination of these methods may be applied to get the desired texture and effect.
It is believed that dumplings symbolize prosperity and good fortune (legend says that a Chinese Imperial chef accidentally over cooked a batch of dumpling and slightly burned one side. He served it to the court and fortunate for him that they loved it). During Chinese New Year and grand celebrations, the Jiaozi is part of the menu. But it doesn't mean that one would have to wait for celebrations to be able to have a wonderful time savoring this appetizer. Just go to any Chinese, Japanese (they call their dumplings as Gyoza) or Korean (Mandu) restaurant and order.
The easy part in making this is store-bought dumpling wrapper. I could make some from scratch but currently, I don't have the patience and time to do it. I could have just left is as plain crescents but I wanted to add a little flair plus presentation so I added "pleats" (see the inset photograph above).
The Ingredients:
1 cup napa cabbage(sometimes called Chinese cabbage or Baguio Pechay), chopped
1/4 cup cilantro leaves, chopped
1/4 cup green onions, minced
1 tablespoon low-sodium soy sauce
1 teaspoon fresh ginger, peeled and minced
1/2 teaspoon dark sesame oil
Dash of white pepper
3 garlic cloves, minced
375 grams lean ground pork
60 grams shrimp, peeled, deveined and chopped
24 oblate/round dumpling wrappers
canola oil, divided
2 cups chicken broth, divided (you may use the fat-free, low sodium for a more healthier approach)
Cooking Procedure:
Mix the first 10 ingredients in a bowl.
Get 1 wrapper and spoon a heaping teaspoonful of filling into the center of the wrapper. Moisten the edges with water then fold in half. Pinch the edges or crimp the edges to seal. Holding the sealed edges of the pot sticker between the thumb and first two fingers of each hand, form 3 to 4 pleats along the seal. Set aside with the seam side up on a dry platter. Repeat the steps until you have filled the remaining wrappers.
Heat 1 1/2 teaspoons canola oil in a large skillet over medium heat. If a non-skillet is used, you have the option to omit the oil or lessen the oil further to a teaspoon at a time. If you have a small skillet, cook the dumplings in 3 batches.
Arrange 12 pot stickers with the seam sides up in pan, and cook for 45 seconds or until browned. Pour 1 cup of the broth and cook for 5 minutes covered. The steam will cook the dumplings through.Uncover and cook about 1 minute or until liquid evaporates . Remove the pot stickers from pan; cover and keep warm. Repeat for the remaining set of dumplings.
Serve with a soy sauce-based dip. The soy sauce-based dip could be a combination of soy sauce, grated ginger, vinegar or lemon juice, a little sugar and a few drops of sesame oil. Chili paste may be added for a more spice.
My Notes: Be careful not burn the bottoms completely because they tend to stick and it would be harder to remove. Keep the initial batches warm and covered because as they cool and is exposed to the air, the wrappers tend to harden.
The verdict: The ready-made wrapper was too thick for Mom's taste. But the filling was good. They were easy to make and cook. I didn't use a non-stick pan and thankfully they didn't stick. Each had a pretty brown crusty bottom. I am planning to serve this for the holidays and bless the family with some prosperity and good fortune.
2007-11-25
Custard or Sugar Apple
Our client was visiting our office and we started talking about local fruits that she has tried at the hotel where she is staying. She loves the local mangoes and the mangosteens. Later in the conversation she was describing a fruit that was red and had spiky hairs. The fruit was white with a large seed. I told her that was a rambutan, similar to lychees but the sweetness is entirely different.
I asked her if the hotel also served a locally grown fruit called atis. In other countries this fruit is called sugar apple or sweetsop. Relative to the custard apple since it belongs to the same Annona family, the meat is sweet having a 50-50 ratio of sucrose and glucose. I showed her a photo of the fruit, and she said they didn't serve this in the hotel. So I brought one the following day. She was amazed and surprised with the sweetness and the number of seeds a fruit could have. She still prefers the rambutan though and couldn't get enough of it.
In my research for this entry, I found out interesting facts about this delectable fruit:
- for every 100g of edible meat, there is 88.9 - 95.7g of calories; 40mg of vitamin C and is a good source of iron.
- the meat may be eaten raw, turned into ice-cream, cider or wine
- there are medicinal properties that may alleviate rheumatic pain, dizziness and fainting spells; treat dysentery, colds and fever. However the seeds are said to be poisonous and may cause blindness despite it's healing remedy for hair lice.
- the blacken aborted fruit is part of the ingredients for "unton" ( a pillow pouch pinned to a child's dress to fight against bales or "bati")
From experience, when buying, pick the firm and harder fruit. The size of the "scales" should have defined groves. It is fine to get the pieces with dark firm spots at the top. Place the fruit in a sturdy container, the firmest on on the bottom and the least on top. When it is ripe, the fruit becomes verify delicate and is easily bruised. In storing, keep in room temperature until it is soft. To prolong it's shelf life, store the fruit in the refrigerator when it is almost ripe but not overly so.
References:
http://www.philippineherbalmedicine.org/atis.htm
http://en.wikipedia.org/wiki/Sugar-apple
http://www.stuartxchange.org/Atis.html
http://www.hort.purdue.edu/newcrop/morton/sugar_apple.html
2007-11-22
Candidate 1: Pineapple Upside Down Cupcakes
As I have mentioned in my previous entry, I am in search for this year's yuletide treat. I happen to come across Rachel Rappaport's site named "Coconut and Lime". It had an interesting name that was definitely catchy. It made me think of the Carribeans, the islands of Guam or Hawaii, and the ethnic countries of Thailand and Indonesia. It even made me think of home... the Philippines. Probably it was the affinity with the word coconut that made me think of these things... That is another story.
Her site had a wide array of recipes that she herself made. They looked easy to do and from the numerous "happy" comments, I had to try one of her recipes. It might end up in my yuletide giveaways this year. So I chose Pineapple Upside-Down Cupcakes. I decided to give this a try because of the simplicity and availability of the ingredients. Not to mention, I opened a can of pineapple tidbits used as a pizza topping and had lots left over. Instead of openning another one with whole slices, I decided to use this instead. I arranged them to look like a star/flower which I thought looked timely for the season.
The verdict: True be told, it didn't raise as high as I thought it would. They tasted really good. My mom, cousin M and co-workers thought so too. I had slight difficulty in removing some that got alittle stuck. Some of the tidbits were stuck on the bottom of the muffin pan when I was removing them, but that was just 3 out of the 12. The rest came out whole and perfect. The caramel sauce made it really moist and sticky.
Maybe for a more festive and attactive presentation, I would add a cherry on the center.
With the permission of the author, I am sharing with you the recipe.
Pineapple Uside Down Cupcakes
Ingredients:
Topping:
1/4 cup butter
1/4 cup light brown sugar
1 tablespoon light corn syrup
20 oz canned pineapple rings in 100% pineapple juice, drain and reserve juice for batter
Cake Batter:
1/4 cup sugar
1/4 cup butter, at room temperature
1 cup flour
1 egg, at room temperature
1/2 cup pineapple juice
1 1/2 teaspoons baking powder
1 teaspoon vanilla
Directions:
Preheat oven to 350. Butter or spray (with cooking spray with flour) 10 wells in a cupcake pan. Cut a 1/2 inch chunk out of 10 pineapple slices and place the slices (not the little chunks) individually in 10 cupcake wells. They should lie flat in the pan and look like a "whole" ring again. In a small saucepan, melt and stir together butter, brown sugar and corn syrup. Cook over low heat about 5 minutes or until it thickens slightly. Stir thoroughly to combine. Pour about one teaspoon of this topping into the bottom of each pineapple ring covered cupcake well. In a medium sized mixing bowl, cream together the butter and the sugar until fluffy. Add the egg and vanilla and mix thoroughly. Add the baking powder, mix briefly then add the flour alternately with the pineapple juice. Pour about 1/3 to 1/2 cup of batter over each pineapple slice and bake for 20 minutes. Cool 20 minutes in pan then invert over a baking rack. You may want to place parchment paper or a towel under the rack because they may drip. Serve on a plate, pineapple side up.
2007-11-21
Bongo Room Brunch
I was busy archiving my photos that I have taken on my recent US trip. I decided to add this as an entry because everyone enjoyed the moment.
It was our last day in Downtown Chicago when my brother, mom, I and J decided to spend it together shopping. But before we headed to the stores my brother brought us to the Bongo Room along Wabash. As you enter the restaurant, it had a perky feeling and ambiance accompanied by lively staff.
They had an array of breakfast dishes that would make your mouth water. I decided to get the Crab Lobster Eggs Benedict with a glass of grapefruit. My brother, I and J got the same dish while mom ordered the Ham and Eggs Benedict. They had fresh brewed coffee. As we wait, I peeked at the neighboring table. Seeing how each bite brought smiles and luster in their eyes made me wish that the food we ordered be there ASAP. Looking at servers bringing the food in for other customers made me hungrier.
True enough, after 10 minutes, I got my plate of eggs benedict topped with crab lobster hollandaise sauce over a crusty bread. It was accompanied by a side dish of potato and bacon. The sauce wasn't overly powering nor rich that you would loose interest with the second eggs benedict. It complimented the dish perfectly that you would want more. My brother and I surely did wanted to get my share when they ate theirs in a whiff.
While we were busy enjoying our meals, my brother saw a family order a mouth watering plate of fresh fruit with ice cream. So he calls the server and adds Strawberry Mango French Toast topped with Vanilla Ice Cream. He also added Banana Pancakes with Chocolate-Cream Sauce topped with Oreo Cookie (I am not sure if this is the correct title). One thing I loved about this place is you could request for a smaller serving. The photo below is only 1/3 of the actual regular serving.
It tasted heavenly and wonderful no less but my tummy couldn't handle the amount of food anymore. A great way to welcome the day of shopping.
2007-11-19
Prices Soar
My mom and I went to Divisoria yesterday. She wanted to get purse for my aunt. I on the other hand had other things in mind... update my blogs and edit photos. But she won, so I tagged along. Divisoria is place where you can get almost everything and anything at a bargain price - all sorts of foods, clothing, bags, home furnishings, plastic wares, electronics, toys, video, mp3s... The list is endless, in my opinion. Now that the Christmas season is nearing, it is one of the hot spots to go to.
We went around the 168 Mall, and was unlucky with the find. She did set her eyes on the persimmons she saw by the corner of the mall. After haggling with the price we went our way to Tutuban Mall. We searched high and low until we found a store that gave us the purse my aunt wanted at a really good price. It was a Coach body purse in the shades of dark brown. For Php 250, the class AAA, Korea-assembled knock-off was not bad.
Since we were in the area, we decided to buy some fruits to add to the persimmons. I approached serveral stalls and asked for their prices for their persimmons. The price ranged from Php 80 to 100 per kilo and depending on the size. Mom was frustrated because she bought hers at Php 130 She lost Php 30 for the bag she bought. Tsk...tsk...
As we headed to Divisoria Mall, there were a wide array of fruits and vegetables, house hold wares that were being sold. I was there 2-3 weeks back and noticed that the prices increased by 35-50%. I got lucky that I was able to stock up with garlic and red onions. The could last me for a few weeks more. I bought 1 kilo (2.2 lbs) of garlic at Php 45 then. Yesterday, they were selling it for Php 60. Fuji apples used to be Php 10/piece and hiked up to Php 50/3 pieces. I was blown away by the difference in price after being away from the area for almost a month. I guess with the prices of gasoline increasing (which is everywhere), product prices will increase as well. The sellers would have to adjust to make their ends meet, and the buyers would wisely budget and spend their hard earned cash to put a decent meal to the table.
I came across an old lady selling all sorts of fruits. She was selling her oranges for Php 10/piece. There was even a sign that claimed the oranges are definitely sweet. There were slightly larger than an baseball and looked sweet and fresh. I bought 5 pieces and my mom was rather skeptic. True enough when we got home, mom opened one and it was sour. So much for guarantees and sweet oranges... I guess I will use them in search for the Christmas treats.
2007-11-16
Callos- Asian Style
I was inspired to surprise my mom with another dish when she arrives from visiting my brother. She requested that I cook Ginataang Hipon with Kalabasa. Rummaging through the freezer, I found ox tripe, choirizo de bilbao, potatoes, carrots, garlic, onions, tomatoes, tomato sauce and a bottle of garbanzos. I remember seeing a recipe called Callos in www.pinoycook.net and decided to try that. I had most of the ingredients in the recipe except for some items. I went to the wet market to get the missing ingredients but I forgot to buy the herbs (basil and rosemary) so I replaced it with coriander. While preparing ingredients, I discovered the bottled garbanzos were the sweetened kind (the one you add to your halo-halo). Poking in the pantry, I saw a can of pork and beans and I decided to use it in place of garbanzos.
The Ingredients:
Set 1
1/2 k. of ox tripe, cleaned, trim off the fat
1 k. of ox leg, clean the skin from any existing hairs, chopped into 1" rounds (I used pork leg since this is what I had at hand at the moment)
1/2 head of a garlic, peeled and chopped
1 medium whole onion, peeled and halved
5 pcs. of peppercorn
1 bay leaf
Set 2
1/2 head of a garlic, minced
1 medium onion, peeled and diced
4 tomatoes, seeded and diced
1 piece of chorizo de bilbao, thinly sliced into disks
1 medium bell pepper. julienned
1 carrot, peeled and diced
2 medium potatoes, peeled and diced
1 can of pork and beans
1/3 c. of frozen sweet peas
500 g. of tomato sauce
1 piece of chili pepper
2 tablespoons of olive oil
2 cups of beef stock, from the boiled meats in set 1
salt
freshly cracked black pepper
1 bunch of coriander (kinchay), chopped
Cooking procedure :
Place the meats in a large casserole and cover with water. Bring it to a semi-boil. Remove the scum floating on the surface. When you have a clearer stock, add the rest of the ingredients from Set 1. Cover and lower the heat. Simmer until the meats become tender (in my case, I boiled the meats approximately 1.5 – 2 hours until the meats are tender and the leg meat falls off from the bone). Add water if necessary. I didn't use a pressure cooker since I used the pork leg instead of an ox's but you may use it to shorten the cooking time.
Set aside the meats and strain the soup stock. Reserve 2 cups that will be used later. You may freeze the remaining stock for future use. I have cut the tripe into strips, about 1/2” x 1” size.
In medium heat, sauté garlic, chili and onions in olive oil. Add the bell peppers and tomatoes; continue stirring until the tomatoes are cooked through. Add the chorizo slices and cook for 1 minute or until the color brightens. Increase the heat and add the meats and stir for about 2 minutes. Pour in the tomato sauce and continue to stir. Add in the broth, carrots, and potatoes. Season with salt and pepper according to your desired taste. Cover and boil until the potatoes are cooked. Add in the pork and beans, and peas. Simmer for a minute to two. Sprinkle in the coriander, stir once and turn off the heat.
My notes : It turned out similar to callos that mom use to make for my brother. But the taste of coriander blew me away because it made a distinct Asian taste. So I guess I will call this dish Callos-Asian style. Hope you could give it a try and let me know how you find it.
The verdict: Mom said that the callos tasted good but why did I add the pork leg. It should only be purely made out of tripe. My sister, J, and L loved it. J even brought some home.
2007-11-14
Requesting Shrimps
Mom was heading back from visiting my brother. A few days before her departure, I was able to talk with her and told her that I received a very good pumpkin from my aunt. It was sweet and starchy that had a creamy, sweet consistency when cooked. She requested if I could cook the pumpkin with shrimps and coconut milk.
We call it Ginataang Hipon at Kalabasa. There are many variations depending on the household with regards to how they prepare this dish.I have known others to mash the pumpkin to make the stew thicker while others just let the pumpkin break up on its own. I know some prefer theirs with a thin
This will be my first attempt to prepare the dish the way she does it. I hope I pass :)
Ginataang Hipon at Kalabasa
Salt
300-400 grams shrimps
1 tablespoon oil
1 thumb size ginger, peeled, sliced into disks
4 cloves of garlic, peeled and chopped
1 medium sized onion, sliced
4 cups pumpkin, peeled, seeded and sliced into ½ inch cubes
1 cup eggplant, sliced into ½ inch length, quartered
1 ½ cup coconut milk, 2nd extraction
1 cup coconut cream or milk, 1st extraction
1 tablespoon fish sauce
½ teaspoon ground black pepper
1-2 pieces finger chilies (siling pang sigang)
1 bunch swamp cabbage (kangkong) leaves, approximately 1 to 1 ½ cup
Remove the whiskers from the shrimps. Season it with salt. Do not season too much else it will end up too salty. Set aside.
Heat the oil in a casserole in medium heat and sauté ginger, garlic and onion. When the onions are almost translucent and the garlic is tender, add in the pumpkin then the eggplant. Saute the vegetables well. Pour in the 2nd extraction into the casserole and lower the heat. Season the pumpkin with ½ tablespoon fish sauce and ¼ teaspoon ground black pepper.
When the pumpkin and eggplant is half cooked add in the shrimp. Stir for a few seconds and cover. Simmer for 2-3 minutes. Add in the 1st extraction and simmer for 2 minutes. Drop in the finger chilies. Adjust the taste by adding remaining fish sauce and black pepper. Continue cooking until you get the desired consistency of the sauce. Add the swamp cabbage then stir once. Turn off heat. You don’t need to worry with the swamp cabbage because the remaining heat will continue to let it cook.
---------------
I asked my mom when she had it for dinner yesterday. I passed with flying colors. :D
2007-11-11
Banana-Apple Turon
We had a bunch of saba bananas that were deliciously ripe. Not too soft and mushy but definitely sweet that I decided to turn it into turon. Turon is a sweet spring roll filled with bananas that is eaten either as a snack or dessert. Some would pair this up with strips of jackfruit, a serving of vanilla ice cream or a sprinkle of toasted sesame seeds. I remember growing up with in the provinces and eating this during the summer afternoons after a good game of tag or hide-and-seek. We still enjoy this simple treat up to this day. :D
I wanted something different to go with the turon by adding apples. I had a few that were just sitting on the fruit bowl. I thought it would be a twist by adding it with a hint of cinnamon. So when I served it for Sunday brunch, it came out pretty good in my opinion. Somehow, it reminded me of apple pie. My sister said so herself when she tried it. But she still preferred the traditional kind - just plain saba please or with a hint of jackfruit.
Saba-Apple Turon
Ingredients:
10 saba fingers, medium ripe, peeled and sliced into 4 strips per finger
1 – 2 apples, peeled, cored and sliced into strips
white sugar
cinnamon
20-30 egg roll (lumpia) wrapper
oil for deep frying
Mix ½ cup of sugar with 1/8 – ¼ teaspoon of cinnamon. Make sure the cinnamon is evenly distributed. I roughly estimated the amount of cinnamon. I would advise that the amount be adjust depending on personal preference. If you prefer to add more, by all means do.
Dip the 2 strips of banana and 2 strips of apple into the sugar-cinnamon mixture. Arrange the coated strips on the egg roll wrapper. Roll the wrapper to almost mid-way. Tuck in the sides to the center thus encasing the fruits in the center. Then roll until you have almost reached the end of the wrapper. Brush the end with water to make is slightly moist but not wet. This will help seal the wrapper and avoid the fruits from spilling out.
Repeat the process until all the fruits have been wrapped.
Heat about 1 cup of oil over medium heat. Fry turon in batches of 5-6 pieces (depending on how large the frying pan is. I use a 8” skillet). This would prevent the oil’s temperature from dropping and avoid from over-crowding the pan. This way the rolls would cook evenly through. Drain in paper towels.
The excess rolls were placed in an air-tight freezer container then placed in the freezer. We just thaw the rolls to almost totally defrosted then fry it into the hot oil. Just be careful of the splatter.
Additional variations:
- Sprinkle over some sesame seeds after draining the turon rolls.
- Instead of rolling the fruits into the sugar-cinnamon mixture. Sprinkle it over the egg roll wrapper before rolling.
- Omit the sugar-cinnamon when rolling the fruits into the egg roll wrapper. After draining, dust it over the cooked rolls instead.
2007-11-08
In search for this year's delicious Yuletide treats
Every year we would send home-made pastries to all our relatives, friends and co-workers as Christmas presents. I remember it started with my aunt who loves to cook and bake. She would send us at least two out of the three pies their household would prepare. That would either be the Pecan Pie, Pineapple Pie or Apple Pie. How much we loved these and always ask for more for the New Year. When she decided to hand down the recipes to us, we made these as part of the the holiday feast at home and in Christmas parties. It ever reached to a point where people would specifically request what to get for Christmas (and it is still true till now). I guess it has become a holiday staple for them too.
But when work took most of my time during the holidays, I had to come up with goodies that would consume less time and produce more. A pie would take atleast 1 to 1.5 hours and my oven isn't huge enough to accommodate all the requests. Aside from that, normally it is a 2 man team. It would either be my mom or the household help who assists me in slaving away these creations. I have been yearly searching for new pastries, cakes and cookies that would be out of the ordinary and special that you could say, "I can taste the wonderful goodness of Christmas!" :D
This year, I am still contemplating on which of the recipes that I will retain and what to try that is extra special and spectacular. If I do find it, I will be more than happy to share with you the toothsome goodness this yuletide will bring.
2007-11-06
Crusty Crustacean
Met up with dad at the San Francisco airport and headed to Red Lobster for lunch. Was it lunch or breakfast? I really can't tell anymore with the time difference and the long flight.
Upon entering, I was fascinated with the large tank filled with lobsters. I wanted to just grab them and see if they are as strong swimmers as Larry Lobster. If you do watch SpongeBob SquarePants, you would know which character I am referring to. If not, he is the lifeguard stationed at Goo Lagoon of Bikini Bottom. If not, probably ask if the saw Sebastian crawling in search for Princess Ariel. Kidding.
I remember the first time I had lobster. It was in Red Lobster too but in a different franchise. I told myself that I should have a taste before I head back home. So my aunt brought me and my mom to the nearest branch in Darien, Illinois. I had expectations that it would taste far different from Sebastian's kin, the crab. When I placed my order and tasted the first bite, I was suprise. It felt and tasted like a cross of white shrimps and king crabs. I guess I expected too much but then I shouldn't sell this crustacean short. I am sure there are other ways of preparing that will bring out its potential. I wonder if it would go well if it was prepared like the Chili Crabs of Singapore or cooked with rich coconut milk, ginger, finger chilis and leaves of swamp cabbage. Hmmmm yummy.
In writing this entry, I tried to search through the net for interesting tidbits about this decapod and found out that:
- Lobsters may outlive us. They are estimated to live up to 100 100 years (unless they were caught and cooked).
- Spiny lobsters gang up on their attacker by displaying their spines outward (their tails are pointing inward to bring out the spines).
- If a predator gets hold of one of the lobster's leg, the lobster casts of the limb, seals the area to avoid infection. The damaged leg will then regenerate or regrow producing a brand new one. Similar to their cousins the crabs. (Pretty neat. Wonder if they are distantly related to Wolverine by any chance :D )
- The largest lobster found weighed around 44 pounds, 6 ounces, 3 feet 6 inches from the end of tail fan to tip of largest claw.
- Lobsters are blue blooded. Not referring to royalty, but to the color of their blood. If iron makes the color of human blood turn red, copper makes lobster blood be blue.
- Lobsters may survive in storage without eating for a year if the shells are hard and are full of meat or reserves.
- The lobster capital of the world is located at Shediac, New Brunswick where the largest lobster sculpture is found.
- The age of a lobster is determined by its size and the hardness of the shell.
- Lobsters are actually red in color caused by a carotenoid pigment. Combined with protein, the pigment reacts and a the greenish-blue color which we naturally see on lobsters.
2007-10-31
Keeping Shrimp Fresh
Everyone in the family loves shrimp. Even my brother who is allergic to it would fight for his fair share whenever mom would prepare shrimp dishes. When ever the "ber" months would start, there would be an abundance of shelled seafood in the markets. Mom would buy 4-6 lbs. of shrimp but will only use 1-2 lbs. in a dish and store the rest. How does she maintain the freshness of the shrimps?
The shrimp whiskers are trimmed off using a pair of scissors or by gently pulling them off, but not necessary. Arrange the shrimps in an air-tight freezer container. Fill the container with tap water. Do not fill the container up to the brim since water expands when frozen but make sure that the shrimps are covered in the water. Freeze the shrimps.
To thaw, we would either leave it under running water or place it in a basin of water which is replaced after 30 minutes until the shrimps are totally defrosted.
True enough, the shrimps retain the same firmness and freshness when we bought them. I am just not sure how long the maximum time they should be kept in the freezer. The maximum that I recall would be a month to two months. Hope this tip helps. I need to go and get more shrimps. :D
2007-10-26
Young Asparagus Mix with Oyster Sauce
I went to one of the markets near our place that sells cooked food. I tried their young asparagus mixed with vegetables and it tasted really good. So I tried to copy it. Too bad I never had the chance to take a photo. :D I only had the photo of the blanched asparagus tips. It was better than the one we bought. Everyone loved it. I was lucky that asparagus was in season and was able to get them for a good buy.
Ingredients:
2 1/2 cups young asparagus, bottoms removed, cut into half
1 - 1 1/2 cup carrots, cut into 1"-length strips
1/2 cup young corn
1 bell pepper, sliced into strips
1 medium sliced white onions
1 tbsp. minced garlic
1/3 cuo tofu, sliced and fried
4 pieces of kani or crab sticks, sliced diagonally
4 - 6 pieces crab balls or fish balls or squid balls (or a combination) halved and pre-cooked
1 - 1 1/2 tbsp. oyster sauce
dash of pepper
Saute garlic and onions in 1 tbsp. oil. Add in the carrots and the young asparagus, stir frying continuously until they become bright colored. Add 1/4 cup water mixed with the oyster sauce and pepper. Simmer of a minute or two, then add the remaining of the ingredients. Mix well until everything is coated with the sauce. Serve hot.
Servings: 5-6 persons
Subscribe to:
Posts (Atom)