Just a collection of everything that comes into my little corner - the kitchen...each I consider a treasure that I would like to share with you.
2007-12-31
Apple Crumble Pie
Ahhh the apple pie that was suppose to be part of the feast... Maybe next year....
Normally we would have this delightful dessert since apples are abundant this time of year. My cousins would eat this with vanilla ice cream... Apple ala Mode! Yummm. Traditionally, we would make the 2 crusted apple pie. But with the time constraint and the lack of helping hands, I have been making Apple Crumble for three years now. When I discovered this, it was heaven sent for me. I usually hate rolling the dough and fitting it on to the pie plate. I used to have a difficult time making an even leveled dough. One side would always be lopsided or thinner. But having baked a lot of pies (I can't count them anymore), I have somehow mastered by now. :)
Tips in making pie crusts:
1) Use cold lard or butter instead of soften or melted.
2) Flaky crusts are made when bits of lard or butter is layered between flour then melts when baked.
3) Add 2 tablespoons of cold water at a time and gradually increase until the dough binds well. If added too much liquid, add a little more flour. Too little water would produce a crumbly dry dough.
4) Don't overwork the dough else it may become tough.
5) Use wax paper or plastic wrap when rolling out dough for less mess on the counter.
6) Start from the center when rolling out the chilled dough towards the end for a more even distribution.
7) Chill the pie crust prior to baking. This will help retaining the shape of the fluted pie border.
8) Peirce the bottom with a few holes using a fork.
9) Brush the bottom with egg white or bake for a few minutes to prevent a soggy bottom.
10) Cut vents to avoid the lower crust from being soggy and it will allow the steam to excape.
2007-12-30
Oriental Steamed Fish
We went to the market to buy seafood a day before the big day. We bought prawns, crabs and lapu-lapu (grouper). I would have enjoyed taking photographs because of the wide variety of fresh foods but I would need both of my hands to carry everything else. So I decided not to bring my camera or cellphone. Maybe in the future, I will get my chance to showcase the abundant treasures the wet market has to offer.
As part of the Christmas feast, we added this dish. Everyone loves how I make it and I decided to share the recipe with you. It is simple and easy to do. The important tip can share with you is that the fish should be at its most freshest state. If you could get live ones, the dish would taste alot better. The meat would be tender and succulent. This is making me hungry for another bite... :)
The Ingredients:
800 grams - 1 kilo whole fish, cleaned, slit both sides with 2 diagonal slits, patted dry
1/4 teaspoon rock salt
1/4 teaspoon sugar
1/2 inch ginger, peeled and sliced into disks
1/2 - 3/4 inch ginger, peeled and sliced into very thin strips
5-8 stalks of green onions, sliced to 2 inch strips
1 small red onion, peeled and sliced thinly
1/4 cup corn or canola oil
2 tablespoon sesame oil
2-3 tablespoon soy sauce
Cooking Procedure:
Place water in a steamer and bring to a boil. Insert ginger disks into the cavity and slits of the fish; let the ginger marinate into the fish to remove the "fishy" smell and taste. Lay the fish on top of the oiled steamer rack. The oiled layer helps the fish from sticking.
If there is no steamer available, take a large wide pan with a lid, add water and place a heat resistant bowl on the center with a heat resistant oiled platter on top. Make sure that when you place the fish, it will fit onto the platter and the pan can be covered well so that the steam would not escape. If the fish happens to be to large, you may slice it into too.
Once the water starts to boil, place the steam rack on top and allow the fish to cook for 25-30 minutes. To know if the fish is done, the juices should run clear and when pierced, the meat is flaky. Try not to overcook else the meat becomes dry.
Once the fish is done, transfer onto the serving dish. Remove the excess liquid from the serving dish; discard the ginger disks then sprinkle with salt and sugar. Heat the corn or canola oil. Arrange the remaining sliced ginger, onions and green onions on the fish. Pour over the soy sauce over the fish. When you see wisps of smoke, add the sesame oil then pour over the fish. This gives a shiny finished look and emits an aromatic scent as the oil cooks the ginger and onions. Just be careful that you do not splatter the oil onto your skin. Serve hot.
Buttered Garlic Shrimps
Everytime there is a special occasion at home, mom would prepare this simple, easy and yummy crustaceans (next to crabs of course). Each member of the family to grab their own share trying to look for the biggest and juiciest. Mom would pile them really high, placing the medium and small sized on top. When everyone have taken their first share of shrimps, Mom would then dig into the bottom center and grab the most biggest and juiciest prawn ever. A sure clever trick.
After peeling away each shrimp, we would dip it back to the butter garlic sauce that was cooked in. Dad prefers to dip his in vinegar will lots of crushed garlic and a pinch of salt. Anyway eaten, they taste really great and one would always go back for more.
The Ingredients:
1-2 lbs. (1 kilo) of fresh shrimps, whiskers trimmed
1 tbsp. rock salt
1 12oz Sprite or 7-up
1 1/2 heads of garlic, peeled and crushed
1/3 cup butter
Cooking Procedure:
Place the shrimp in a frying pan or wok and season with salt. Pour in the soda. Cover the pan and heat for 8 minutes or until the shrimps are bright in color. Do not over cook because the shrimps will become tough. Set aside.
Melt butter. Saute in the garlic until they become tender and light brown in color but not burnt. Toss in the cooked shrimp in the butter garlic mixture. Add a few tablespoons of the liquid used in boiling the shrimp. Simmer for a minute or two then transfer into a serving plate.
Holiday Feast
Finally, time to update and get back on track. I have been busy with my Christmas Project, baking and cooking for the Christmas presents for family and friends. I am pleased with the out come with the search for this year's baked treat. I will share with you the winning recipe soon. I never got the chance to shop for the gifts for my godkids, so I ended up giving them Christmas money instead. I am sure their parents would know what to do with it. (Most of my godchildren are in the toddler stage to pre-school).
This year, we are celebrating Christmas and mom's birthday with simple dishes. Yes, you read it right. Mom's birthday falls on Christmas day. She says that it is a great honor to have the same birthday celebrations with Christ but it deprives her of having two gifts in a year. Aw, mom... I try to make sure that she gets 2 presents from me. I love receiving gifts but I love giving more. It is a delight to see the wonder smiles and eyes lit-up.
So back to the feast... Here is the menu:
Macaroni Salad
Mom's Pancit (Egg Noodles)
Buttered Garlic Shrimps
Pork Spring Rolls
Oriental Steamed Fish
Honey Garlic Roasted Chicken
Roasted Suckling Young Pig (Lechon de Leche)
Steamed Rice
Assorted Softdrinks
Fruit Salad
Leche Flan
Mango Dulce de Leche and Rocky Road Ice cream
Green Tea and brewed coffee
We had home-made Apple Pie to the list but decided to present this to a relative. I accidentally miscalculated the number of recipients and the pies I made. I was one short. :)
I will be posting some of the recipes and hopefully you would try them. May you enjoy your holiday celebration filled with love and laughter as much as we enjoyed ours.
Happy Holidays!!!
2007-12-20
Spiced Spiked Pumpkin Muffins
As I was busy with my search for the ultimate Christmas goodies for this year, I thought of using locally grown products and something that would make the treats not only delicious but healthy at the same time. When we received 2 heads of winter squash from the province, I decided to look for something made out of pumpkins. I came across Farmgirl Fare's Spicy Pumpkin Pecan Raisin Muffins. The photo beaconed me to give the recipe a chance. So after studying and thinking of tweaking the ingredients, I was able to create a spiced and spiked pumpkin muffin. I replaced the orange juice with triple sec, and increased the amount of the wheat flour to 1 cup and subtracted half a cup from the flour. I ran out of honey so I replaced it with maple syrup.
The Ingredients:
1 cup raisins
3/4 cup Triple Sec (or rhum)
2 1/2 cups all-purpose flour
1 cup whole wheat flour
2 teaspoons baking soda
1 teaspoon of each: baking powder, salt, cinnamon, nutmeg
1/2 teaspoon ground cloves
1/2 cup margarine or butter
1 cup brown sugar, packed
1/2 cup maple syrup
3 eggs
1 pound fresh pumpkin puree (about 450 grams, peeled, boiled and pureed)
1 cup chopped nuts (i used walnuts)
Cooking Procedure:
In a saucepan, boil the raisins with the triple sec until plump. Set it aside.
Combine the dry ingredients together. Combine margarine, sugar, maple syrup, and eggs in a large bowl and mix well. Stir in pumpkin puree. Fold in the dry and wet ingredients into the pumpkin mixture alternately. Stir in the nuts.
Pour 2/3 cup-full into greased muffin or cupcake tins. Bake until a toothpick inserted in the center comes out clean, about 25 to 30 minutes in a 350F pre-heated oven. Cool muffins in tins for 15 minutes on wire racks. Store in an air tight container.
My Notes:
My first attempt in making this was a flop. I over mixed it and failed to notice that I used dark brown sugar instead of brown sugar. The cake became too sweet and crumbly. But we enjoyed the spicy spiked taste with a hint of maple. I didn't want to put this to waste, so I whipped up some heavy cream, and added alittle vanilla. Layered it then topped with chocolate curls. Chilled it for 4 hours. I had an instant Refrigerator Pumpkin Spiked Cake. (Sorry I forgot to take a photo.)
In my second attempt, I had the sugar and procedure right. I had a couple of pumpkin puree left over, so I topped some of the muffins with a tablespoon before placing it in the oven. It had a creamy top and gave a more pumpkin flavor.
For a ginger-y taste, add 1 teaspoon of ginger.
Keeping them in a tight container for a few days in the refrigerator, the muffins had a similar taste to fruitcakes without the extra dried and glaced fruit.
The verdict:
Not bad at all... Not bad at all... A definite potential...
To Farmgirl Susan:
Thank you for this wonderful recipe. I definitely enjoyed making them. I am looking forward to repeating the experience soon. :)
2007-12-17
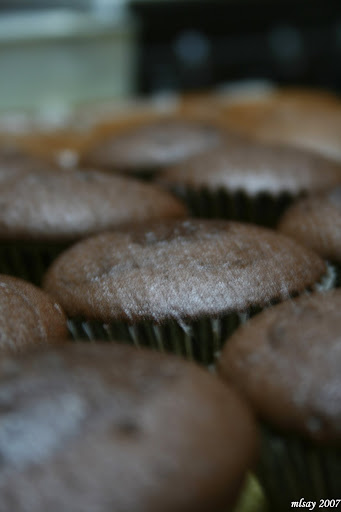
Rich Chocolate Cupcakes
In continuation with the previous entry about my Christmas Project and chocolate cupcakes, this is the second installment. This version is moist and almost feels like it melts-in-your-mouth. It is definitely really as good as the other recipe. The preparation and preparation is similar except the eggs were separated. The whites were beaten stiff while the other one didn't require this step.
I hope you enjoy this version as the much as I did.
The Ingredients:
1/2 cup + 2 tablespoons butter
1 cup sugar
2 eggs, separated
3/4 cup milk
2 cups all-purpose flour
2 teaspoons baking powder
1/4 teaspoon salt
1/4 teaspoon baking soda
1 tablespoon vanilla extract
8 tablespoons cocoa powder
Cooking Procedure:
Combine all the dry ingredients and sift together. Beat the egg whites until they are stiff, set aside. Cream the butter and sugar. In a separate bowl, beat the yolks until creamy. Add yolks with the butter mixture, mix thoroughly. Add alternately the milk and flour, adding alittle at a time until thoroughly mixed. Fold in stiffly beaten egg whites into the mixture. Fill in muffin tins about 2/3 cup full and bake in a pre-heated oven at 375F for 25 minutes or until the muffins are done.
My Notes:
Use room-tempered eggs when beating egg whites. Try to use whipped egg whites immediately after it has reached the desired stage to avoid deflating.
If it was over whipped, add another egg white and beat until the desired stage is reached. (But note that the measurements are not accurate anymore since the proportions in the recipe has changed with the extra egg white.)
Pink and Green Choco Cupcakes
In line with my Christmas Project, I thought of doing cupcakes as one of the possible candidates. Loving chocolate, I thought why not chocolate cupcakes with butter cream icing. I had to back out from the idea because it would require that the cupcakes be delivered ASAP so that the butter cream would not melt. With the weather we have, the possibility of transporting boxes of cupcakes to all the houses of my recipients might turn out into a disaster. I also do not have enough room to store all the made cupcakes in the refrigerator. (How I wish I had those industrial refrigerators that would be large enough to store everything I need and create). Besides, I prefer to give my goodies on the same day they were made. That way I make sure they are at their most freshest state. (This rule does not apply for fruitcakes thought :D)
I tried two versions of chocolate cupcake that my aunt shared with me. Both are chocolaty good but the other one is denser than the other. I used the excess frosting I made for the carrot cake and added food coloring to differentiate one from the other. Now I can't remember whether the green one was denser than the pink. Oh well, I am still going to share this with you in case you just want to try it out and judge for yourself which one is best.
I am going to separate the second Chocolate Cupcake recipe so that you wouldn't be scrolling down and it would be easier for you to bookmark the version you like best.
The Ingredients:
2 eggs
1 cup sugar
1 cup all-purpose flour
6 tablespoons unsweetened cocoa powder
2 teaspoons baking powder
1 teaspoon vanilla essence
2/3 cup milk
2/3 cup butter, melted
Cooking Procedure:
Grease the muffin tins or cups with oil or line them with paper muffin cups. Preheat the oven at 350 deg F or 180 deg C. Mix all the dry ingredients together. Beat the eggs and sugar together. Add 1/3 of the dry ingredients and and 1/2 of the milk. Mix together and alternately add the dry and wet ending with the last 1/3 of the dry ingredients. Add vanilla. Fold in the butter. Pour into muffin tins filling only 2/3s full. Bake for about 30 minutes or until an inserted wooden toothpick or knife comes out clean.
Serves 12 regular sized cupcakes.
My Notes:
I frosted with the remaining cream cheese frosting I used to frost the carrot cake. I could have frosted it with chocolate ganache or icing but wouldn't want the cream cheese frosting go to waste. I dropped a few food coloring into the frosting to get the desired color. I just can't remember if I used the green or red frosting to top these. :D
The verdict:
The chocolate cupcakes were good according to everyone who tried it. One found the frosting too sweet with the cupcake. My gut feel tells me that the search is still on.
2007-12-06
Orange Speckles
Mom was requesting for carrot cake and decided to make her one. I halved the recipe batter and the frosting into two. The first half was placed into a loaf pan and the rest into muffin tins. I baked the cupcakes for about 15-20 minutes. I was considering of adding this as part of my Christmas Project but decided not to. There are plenty of carrot cakes out there already. I know it is simple to do and the ingredients are not hard to find. But I want a special one that is different.
One thing I got out of this adventure, I was able to play around with food coloring and modified the look of the cream cheese frosting. I didn't want to store it in the freezer for future use. I added the remaining grated carrot (about 1/3 cup) to 1/3 of the frosting. And viola, an orange speckled frosting over moist carrot cupcakes. The taste of carrots in the frosting wasn't that evident but the color and texture was pleasing IMHO.
Loaf of Carroty Goodness
Mom asked me to make carrot cake. I took the challenge and wanted to make something different out of it. Of course, she wouldn't have any of that. So to compromise I halved the recipe batter and the frosting. I made her a carrot cake without the layers and baked it in a loaf pan. The other half of the recipe went to my Christmas Project.
Normally we would not add the cream cheese frosting for our carrot cakes. But I wanted to play with food coloring that time so I went ahead. I enjoyed making pink and green colored frosting. As a result, I had 3 colors of frosting: white which ended up on the carrot loaf; pink for chocolate cupcake 1 and green for chocolate cup cake 2. I still had a lot left over and decided to do this. Just click on the link to find out ;).
For amateur "food colorists", do be careful that you do not get some on your palms. I ended up having red and green spots. But need not be alarmed, they wear off in time.
Carrot Cake
from Mom's Recipe files
The Ingredients:
The Cake:
3 eggs, beaten
1 1/2 cups sugar
1/4 cup vegetable oil
1 teaspoon vanilla
1 teaspoon baking soda
1 teaspoon salt
1 teaspoon cinnamon
2 cups flour
3/4 cup buttermilk*
3 cups grated carrots (about 1 - 1/2 kilo carrots, peeled and grated)
1/2 c. chopped nuts
Cake Cooking Procedure:
Preheat your oven at 350 degrees. Grease and dredge 2 9x9 round cake pans or 2 loaf pans. Combine all the dry ingredients in a bowl. Beat the eggs, sugar, oil and vanilla together. Add 1/3 of the flour mixture then 1/2 of the buttermilk; add the flour and buttermilk alternately until the mixture is slightly lumpy. Add carrots and nuts; blend well. Bake for 35-45 minutes or until the cake is done**.
Prepare the frosting recipe below.
If you used 2 9x9 round pans, Frost the top of the bottom layer by spreading almost 1/3 of the frosting. Place the second cake on top. Frost the top and sides with the remaining frosting.
If you used loaf pans, divide the frosting into to and frost each of the loaves.
The Cream Cheese Frosting:
3 ounces cream cheese, softened
1/4 cup butter or margarine
2 cups powdered sugar
2 teaspoons vanilla
1/4 cup chopped nuts
Frosting Procedure:
Cream butter and cream cheese. Add the vanilla and powdered sugar. Fold in the nuts.
My Notes:
* Buttermilk Substitute
If buttermilk is not available, add 1 tablespoon of vinegar or lemon juice for every 1 cup minus 1 tablespoon of milk. Let it stand for a at least 10 to 15 minutes.
** Cake-is-Done Test
You may use the knife or toothpick test to check if the cake is done. Insert the knife at the center of the cake; when you pull it out and it comes out clean, the cake is done. If not, continue to let it cook and retest.
2007-12-03
Candidate 2: Crunchy Nanas
While browsing the net I came across BakingBites and saw the Crunchy Banana Muffins. I thought of adding this entry as one of the candidates for the Search for Christmas treats 2007. The recipe was simple, the ingredients were readily available and it was a different approach to the traditional banana bread we would give to loved ones. My aunt who is a prime lover of banana bread would definitely love this.
The verdict: It was good for taste and appearance. It was definitely moist. My blunder was the crumble. It should have a crunchy top. I have over mixed it and the butter became too soft. I should have made the crumble last or at least placed it in the fridge to keep it's shape. It still was fun to make and the folks who have tried it said it was good even without the crunch.
And the search continues...
Note: I hope Nicole of BakingBites wouldn't mind me linking back to her site. I would love to post her recipe her but I still haven't heard from her yet. You may visit the link here to get the recipe and try it out.
Update: Yipee. I can share with you the recipe. Thank you Nicole! :D
Banana Crumb Muffins
from BakingBites.com
Muffin batter:
1 ½ cups all purpose flour
½ tsp baking soda
½ tsp baking powder
½ tsp salt
2/3 cup sugar
3 tbsp vegetable oil
½ cup buttermilk
1 egg
2/3 cup (2 medium) mashed bananas, divided
1 tsp vanilla
Crumb topping:
½ cup flour
1/3 cup sugar
¼ tsp salt
3 tbsp shortening, cut into small pieces.
1 tbsp mashed banana (reserved from 2/3 cup mashed banana)
Preheat oven to 350F. Grease or line 12 muffin tins with paper liners.
Prepare the crumb topping: In a small bowl, whisk together flour, sugar and salt. Cut shortening into flour mixture until it resembles coarse crumbs. Larger crumbs are a bit more desirable. Stir in the mashed banana and set bowl aside.
Prepare the batter: In a medium bowl, sift together flour, baking soda, baking powder and salt. In a large bowl, whisk together sugar, vegetable oil, buttermilk, egg, bananas and vanilla. Pour flour mixture into banana mixture and stir until batter is just combined. Spoon into muffin tins, filling each 2/3 full. Top each muffin with crumb mixture, dividing it evenly.
Bake for 18-21 minutes, until a tester comes out clean and the muffins spring back when gently touched.
Makes 12 muffins
2007-12-02
Stuck to the Pot
I have been procrastinating in making dumplings for a few weeks now until I took the opportunity to really try my skills in making this simple dish.
Dumplings are distantly related to wantons because both may contain meat and vegetable fillings. However, the dumpling wrapper is thicker and oblate in shape and sealed by crimping the edges together making a closed crescent or purse. These are usually accompanied by a soy sauce-based sauce with and or chili paste. In cooking dumplings, they can be just steamed, boiled, pan or deep fried. Or a combination of these methods may be applied to get the desired texture and effect.
It is believed that dumplings symbolize prosperity and good fortune (legend says that a Chinese Imperial chef accidentally over cooked a batch of dumpling and slightly burned one side. He served it to the court and fortunate for him that they loved it). During Chinese New Year and grand celebrations, the Jiaozi is part of the menu. But it doesn't mean that one would have to wait for celebrations to be able to have a wonderful time savoring this appetizer. Just go to any Chinese, Japanese (they call their dumplings as Gyoza) or Korean (Mandu) restaurant and order.
The easy part in making this is store-bought dumpling wrapper. I could make some from scratch but currently, I don't have the patience and time to do it. I could have just left is as plain crescents but I wanted to add a little flair plus presentation so I added "pleats" (see the inset photograph above).
The Ingredients:
1 cup napa cabbage(sometimes called Chinese cabbage or Baguio Pechay), chopped
1/4 cup cilantro leaves, chopped
1/4 cup green onions, minced
1 tablespoon low-sodium soy sauce
1 teaspoon fresh ginger, peeled and minced
1/2 teaspoon dark sesame oil
Dash of white pepper
3 garlic cloves, minced
375 grams lean ground pork
60 grams shrimp, peeled, deveined and chopped
24 oblate/round dumpling wrappers
canola oil, divided
2 cups chicken broth, divided (you may use the fat-free, low sodium for a more healthier approach)
Cooking Procedure:
Mix the first 10 ingredients in a bowl.
Get 1 wrapper and spoon a heaping teaspoonful of filling into the center of the wrapper. Moisten the edges with water then fold in half. Pinch the edges or crimp the edges to seal. Holding the sealed edges of the pot sticker between the thumb and first two fingers of each hand, form 3 to 4 pleats along the seal. Set aside with the seam side up on a dry platter. Repeat the steps until you have filled the remaining wrappers.
Heat 1 1/2 teaspoons canola oil in a large skillet over medium heat. If a non-skillet is used, you have the option to omit the oil or lessen the oil further to a teaspoon at a time. If you have a small skillet, cook the dumplings in 3 batches.
Arrange 12 pot stickers with the seam sides up in pan, and cook for 45 seconds or until browned. Pour 1 cup of the broth and cook for 5 minutes covered. The steam will cook the dumplings through.Uncover and cook about 1 minute or until liquid evaporates . Remove the pot stickers from pan; cover and keep warm. Repeat for the remaining set of dumplings.
Serve with a soy sauce-based dip. The soy sauce-based dip could be a combination of soy sauce, grated ginger, vinegar or lemon juice, a little sugar and a few drops of sesame oil. Chili paste may be added for a more spice.
My Notes: Be careful not burn the bottoms completely because they tend to stick and it would be harder to remove. Keep the initial batches warm and covered because as they cool and is exposed to the air, the wrappers tend to harden.
The verdict: The ready-made wrapper was too thick for Mom's taste. But the filling was good. They were easy to make and cook. I didn't use a non-stick pan and thankfully they didn't stick. Each had a pretty brown crusty bottom. I am planning to serve this for the holidays and bless the family with some prosperity and good fortune.
Subscribe to:
Posts (Atom)